
nginx搭建私人直播服务
今天闲的无聊,打算自己搭一套直播服务试试,以下为搭建流程,顺便记录一下。
环境为centos7
安装宝塔
见宝塔官网
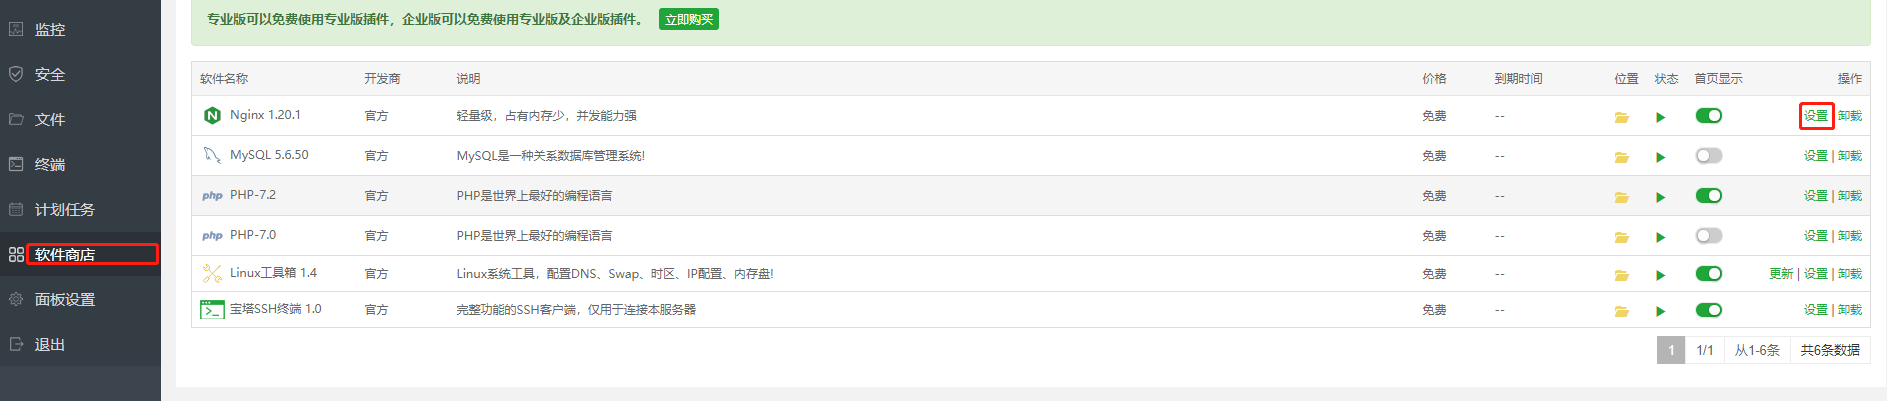
安装NGINX
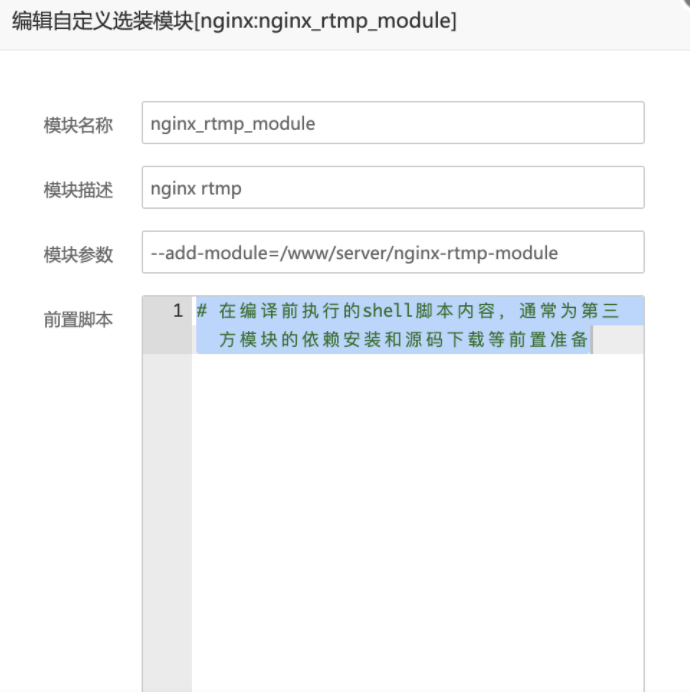
软件商店-》安装nginx:选择编译安装,并添加自定义模块
模块名称:nginx_rtmp_module (自己按要求随意填写)
描述: nginx rtmp (自己按要求随意填写)
参数:–add-module=/www/server/nginx-rtmp-module
前置脚本:
git clone https://github.com/arut/nginx-rtmp-module /www/server/
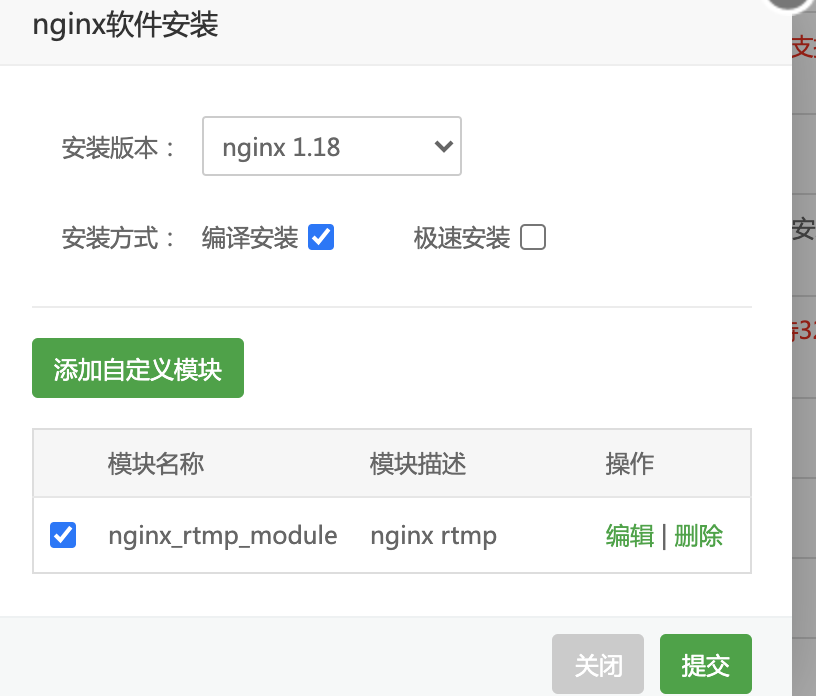
安装完成后nginx -V (大写V)查看是否安装成功

配置直播服务器
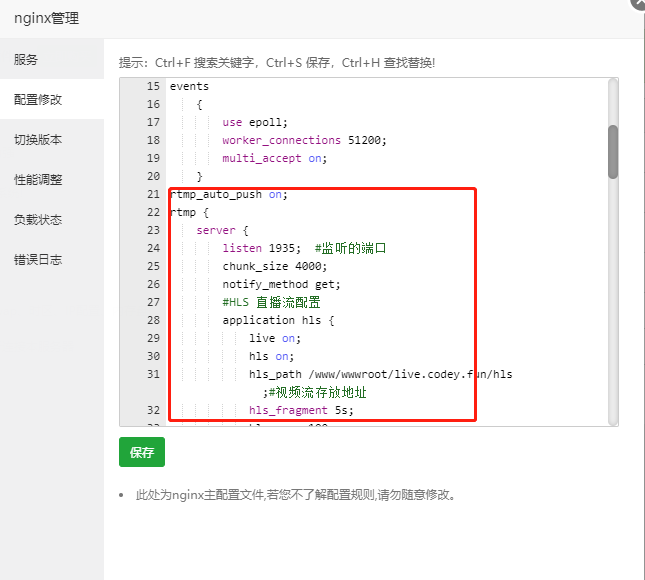
1,修改nginx.conf配置
添加如下配置:
rtmp_auto_push on;
rtmp {
    server {
        listen 1935;  #监听的端口
        chunk_size 4000;
        notify_method get;
        #HLS 直播流配置
        application hls {
            live on;
            hls on;
            hls_path /www/wwwroot/live.codey.fun/hls;#视频流存放地址,注意修改为自己的网站目录
            hls_fragment 5s;
            hls_sync 100ms;
            hls_playlist_length 15s;
            hls_continuous on; #连续模式。
            hls_cleanup on;    #对多余的切片进行删除。
            hls_nested on;     #嵌套模式。
        }
    }
}
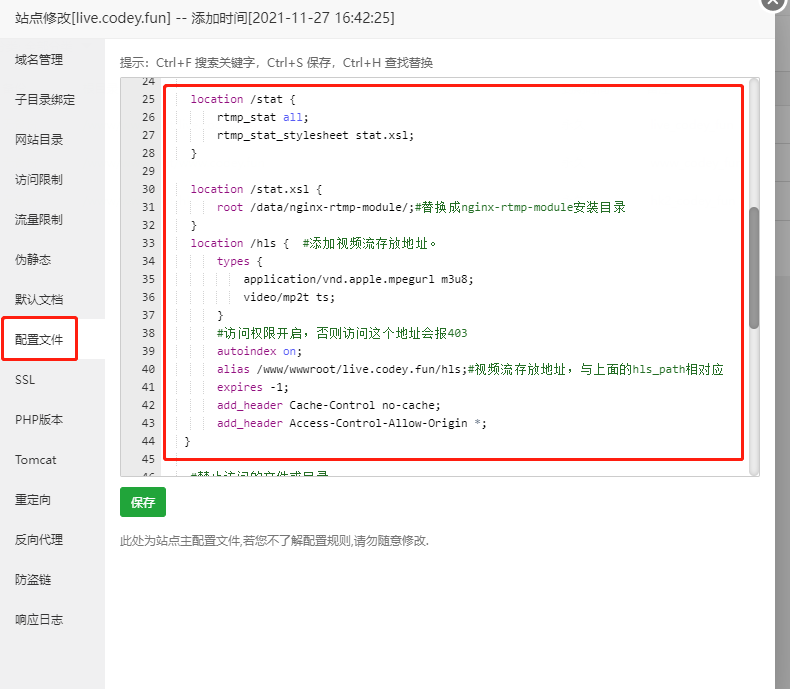
2,修改网站配置
location /stat {
        rtmp_stat all;
        rtmp_stat_stylesheet stat.xsl;
    }

    location /stat.xsl {
        root /www/server/nginx-rtmp-module/;#替换成nginx-rtmp-module安装目录
    }
    location /hls {  #添加视频流存放地址。
        types {
            application/vnd.apple.mpegurl m3u8;
            video/mp2t ts;
        }
        #访问权限开启,否则访问这个地址会报403
        autoindex on;
        alias /www/wwwroot/live.codey.fun/hls;#视频流存放地址,与上面的hls_path相对应
        expires -1;
        add_header Cache-Control no-cache;
        add_header Access-Control-Allow-Origin *;
   }
以上配置完成后重启nginx服务
3,宝塔安全中心放开端口:1935

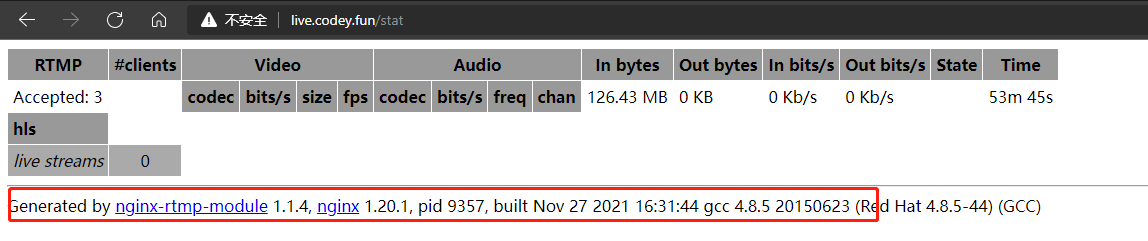
4,验证服务是否安装成功
直播准备
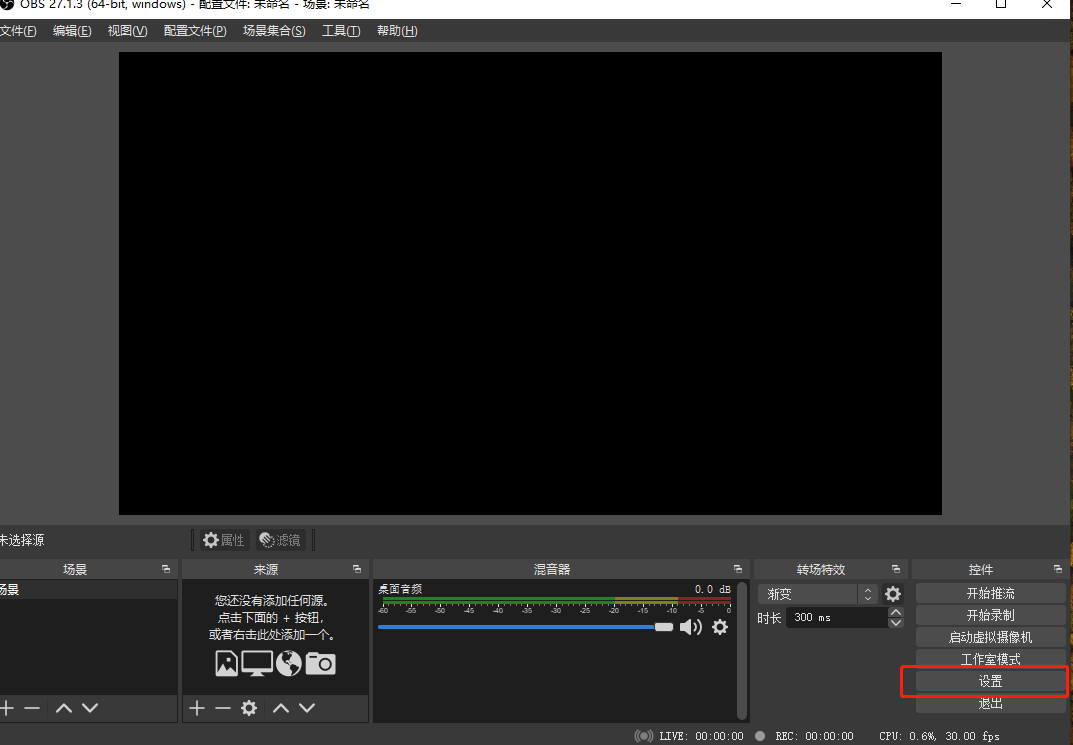
1,安装推流软件OBS
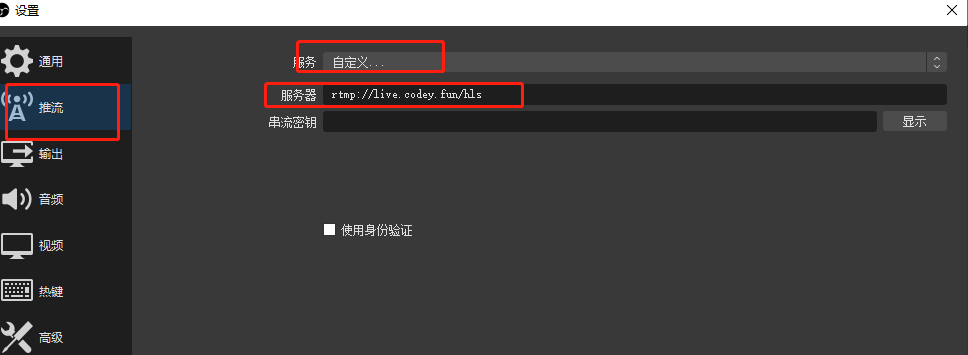
a,配置推流链接:rtmp://live.codey.fun/hls
b,添加直播原并推流

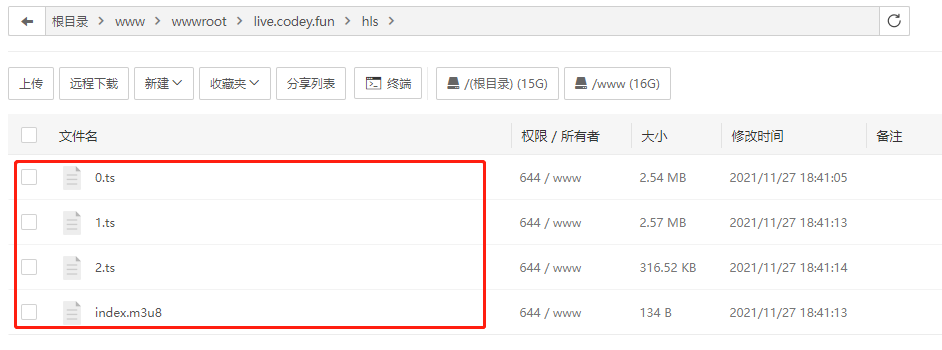
已添加桌面采集为例,完成后,点击开始推流,访问 http://live.codey.fun/stat 查看或者在网站根目录生成推流文件
2,网站上传直播代码
liveplayer.rar
下载liveplayer.rar文件,上传到网站根目录并解压(先要删除原来的index.html)
本文是原创文章,采用 CC BY-NC-ND 4.0 协议,完整转载请注明来自 codey.fun
阅读建议

评论
匿名评论
隐私政策
你无需删除空行,直接评论以获取最佳展示效果